 By Paula Wethington @WethingtonPaula
Have you seen Pinterest accounts where each board has a themed cover image that matches the brand or account?
It’s easier to create this visual cue than one might think. If you do it, you can create a very professional appearance for your Pinterest account!
To explain, branded or themed covers is a visual design element. It is possible to do on Pinterest because you can pick one image to serve as the “cover” for each board or collection. Think of the design opportunities as you compare this to the cover images on your Facebook or Twitter accounts. The board cover is seen as a bigger image on your Pinterest page than other recent pins.
However! The vertical images that best work on Pinterest don’t always fit into the square space for covers. How can you get around that?
The answer: you can design a collection of image specifically for the covers. And because so few businesses or individuals create branded covers on Pinterest, this is very impressive when done well!
If you don’t have graphic design software or need a free option, an easy way to do this project is through a image creation service called Canva.
Since writing the original version of this post in March 2017, I have since started using another budget-friendly image creation service, Snappa, for some of my image designs.
Either service will work just fine for this project.
1. Color selections
If you have already picked a color palette as part of your logo or branding kit, those are the colors you will select from.
If not, then pick a photo or your logo as your starting point. Your social media profile image is a logical choice. Now go to the Canva Color Palette generator. Upload your image.
You’ll get something like this – a color palette that was based off a photo of me in a teal business jacket: Take screenshot of the five colors with the hexcode numbers that appear beneath them. Paste that along with a copy of your logo into a word document. Now you have the color choices as a reference point.
But as you try these out, you may decide you want other colors. I did.
That’s why I saved a whole lot of ideas on my Pinterest board about color theory. I ended up picking what I liked best from multiple palettes and came up with my new social media color scheme. The rose, gray and off black palette doesn’t exactly match the photo of me in a teal jacket. But this range of colors works much better for creating images!

2. Font selections
Now look through the Ultimate Guide for Font Pairing as found on Canva Design School’s blog. You’ll find samples of fonts that work well together and suggestions of which designs fit specific themes.
Make a note of font names that you think fit your brand, project or persona and try them out on a few samples.
I picked Lora font as my go-to font choice long before I settled on my social media branding colors!
3. Create the square template
You may find tutorials on the web referencing the former rectangle sizings for Pinterest cover images. Use the designs as inspiration, but ignore the sizing ratios.
Instead, the current sizing for that space is square. I’ve experimented with both 800 px by 800 px and 1080 px by 1080 px. Either one will work.
Pick a color from your palette to serve as a background and start making some designs. You will use the hexcode to tell Canva or Snappa what colors you want. (Canva has helpful Design School tutorials to help get you started)
4. Design a sample
If you are working in Canva and hope to keep this effort budget-friendly, I recommend you select from the free templates and icons. The reason is you’ll pay for every download on premium images and you may have quite a few samples and covers by the time this is all done.
But play around with your options.
 Type a headline and text using the fonts you already chose.
Pick colors from your palette and change the colors of your headline and text.
Do you like what you see? If not, keep trying. This sample was made I was brainstorming my early choices.
When you end up with an arrangement you like, save and download it.
Now download and paste some sample designs into the document that has your logo, photo and hex code images. This file is now your style guide, sometimes called a branding board.
5. Make one Pinterest cover
 Create your first Pinterest cover. Include the board name with your headline font. Download your image.
Go to Pinterest. Tap the + sign and load it up as a image pin to the selected board. You can fill in that link box to lead to your website or even back to that Pinterest board.
After the image pin is uploaded, go to the edit feature for that board and change the cover. Since it’s your most recent pin, you’ll find it quickly.
Do you need to make the words larger? Move the logo to a slightly different spot? Do you want to change the colors?
If it just doesn’t look right, delete the pin and start over.
6. Make the rest of your covers
 If you are using Canva, you can’t copy and paste work from one image into a new image. There are options for resizing images and saving brand colors in Canva for Work, but definitely not in the free usage side.
The workaround is treat your first image as a template. Create and download one. Now go back to your dashboard in Canva, change the text on the image, download that with a different file name. Repeat.
If you have a membership to Snappa, you can save and duplicate images as you make a collection.
The ones I made on the Monroe News account are from Canva; the ones currently on my account are on Snappa.
7. How many do you need?
Do you need a branded cover on every Pinterest board? My theory is no. Focus on the boards that complement each other and are the primary theme of your account.
Boards that focus on just for fun or personal interests can have slightly different covers or no covers. Remember that unrelated boards can be sorted to the bottom of your page or hidden in the secret board tab.
 Group boards also are a complicated situation in that only the board originator can create and set a cover. If you are the leader and wish to design a cover, go ahead; otherwise, don’t worry about it. After all, group boards are their own niche purpose on Pinterest.
For example: One of my group boards is a joint board between me and the newspaper where I work. I styled the cover for the design used on the newspaper’s Pinterest account.
Want more tips?
Pinterest works very differently from other social media networks – and not just because of the demographics that skew toward females.
It’s best understood as a search engine where evergreen content can continue to pick up an audience for months (and sometimes years) as long as the image and description fit the visual searches of Pinterest . As a result, it’s a nice counterpoint to time-sensitive or viral content you may be posting on other social networks.
I have quite a bit of pins on several social media topics in my Pinterest collection. If you’re specifically looking for a discussion and examples about branded Pinterest covers, check out what Brilliant Business Moms has posted at How to Make Pinterest Board Covers in 2017 – and Why You Need Them!
This post was written March 24, 2017; and updated May 19, 2017.
Save
Save
Save
Save
Save
Save
Save


 Assuming you have a great content plan for your social media, let’s start moving that trend in the direction you want. I have a list of quick tasks that you can do in 10 minutes or less.
 By Paula Wethington
 By Paula Wethington /
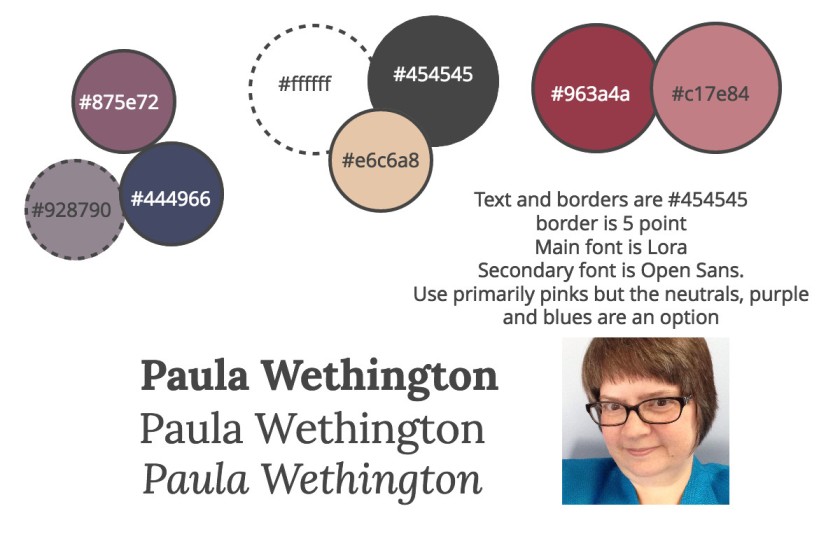


 By Paula Wethington
 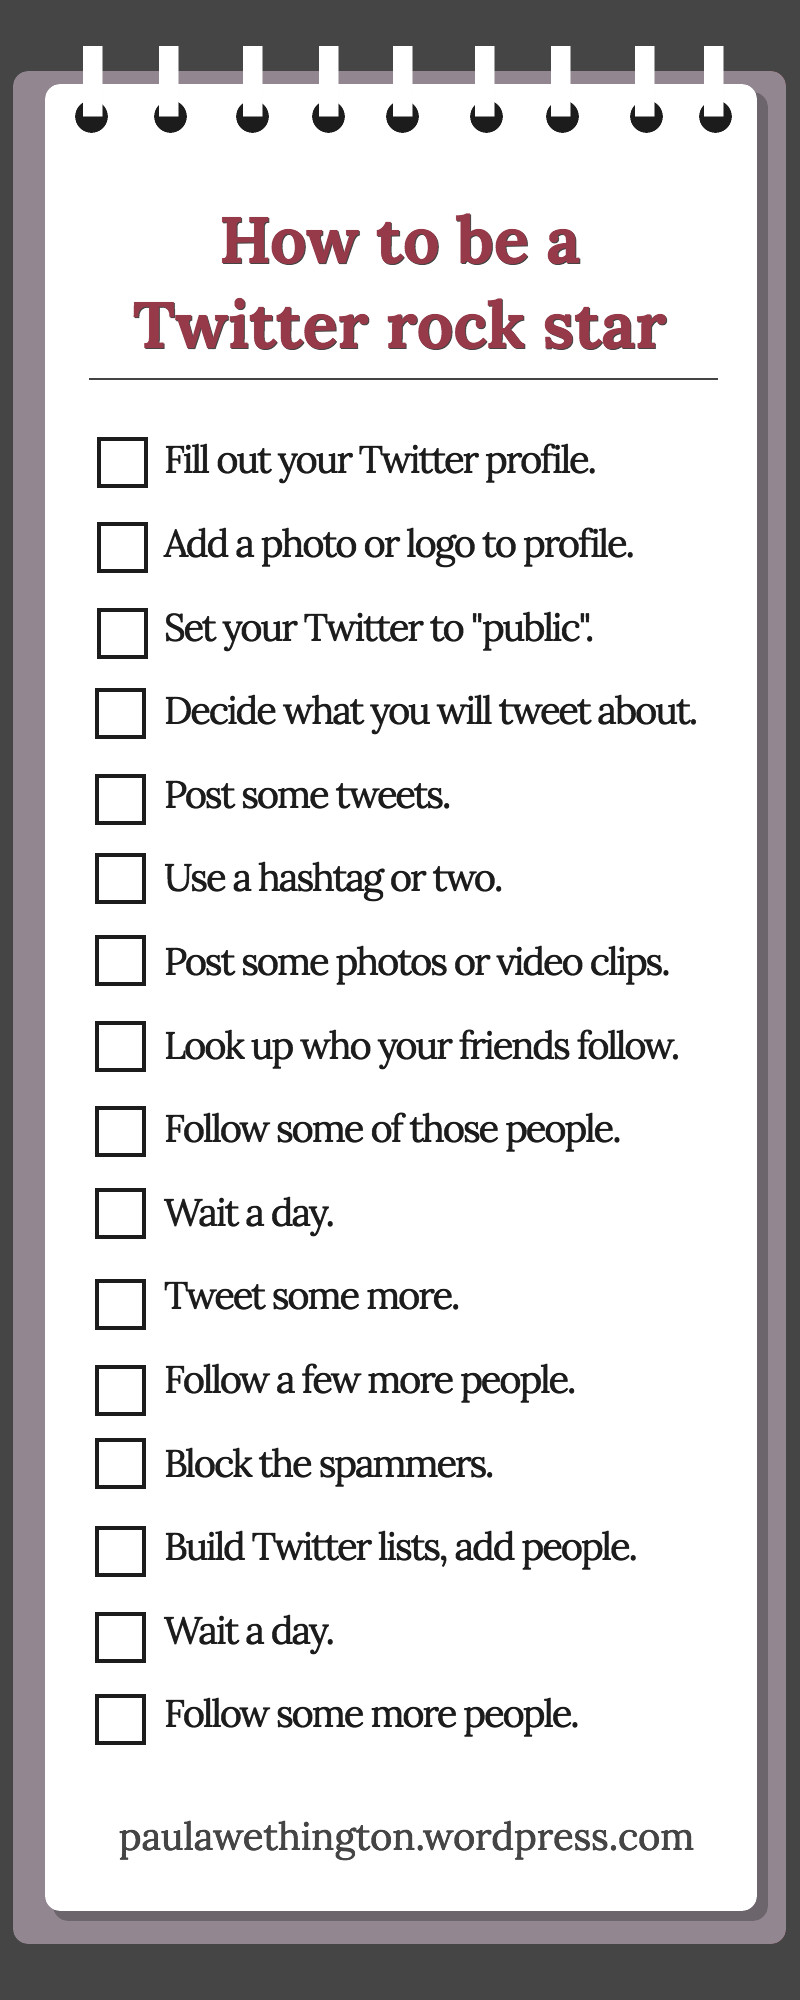 Are you ready to give up on Twitter as a communications and marketing opportunity because followers and conversations don’t seem to happen?